Adventure Travel Photography Tips for Beginners
Master adventure travel photography with these beginner-friendly tips. Camera settings, composition, gear, and techniques for stunning outdoor photos.
This post may contain affiliate links. Disclosure
Updated for 2026 — Accurate as of March 2026.
You climb for three hours to reach a ridgeline at golden hour. The mountains glow amber and violet. The light is perfect. You pull out your camera, fire off twenty shots, and when you look at them later, they are flat, lifeless images that capture none of what you experienced. This is the universal frustration of adventure travel photography, and it happens because great locations do not automatically produce great photographs. Technique does.
The good news is that adventure travel photography is not as complicated as the professionals make it look. A handful of fundamental skills — understanding light, composing deliberately, choosing the right camera settings, and knowing when not to take a photo — will transform your adventure images from forgettable snapshots to photographs worth printing. You do not need a $3,000 camera body. You do not need a backpack full of lenses. You need knowledge, practice, and the willingness to slow down for thirty seconds in moments that deserve it.
This guide is written for beginners. If you already understand aperture priority mode and the rule of thirds, skip ahead to the adventure-specific sections. If those terms mean nothing to you, start here.
The Three Settings That Matter
Every photograph is determined by three variables: aperture, shutter speed, and ISO. Understanding these three settings is the single most impactful thing you can do to improve your photos.
Aperture (f-stop)
Aperture controls how much light enters the lens and how much of the image is in focus (depth of field).
- Low f-number (f/2.8, f/4): Wide aperture. Lots of light. Shallow depth of field — your subject is sharp, the background is blurry. Best for portraits and isolating subjects.
- High f-number (f/8, f/11, f/16): Narrow aperture. Less light. Deep depth of field — everything from foreground to background is sharp. Best for landscapes and sweeping scenery.
Adventure travel default: f/8. This gives you sharp landscapes with sufficient depth of field for most outdoor scenes. Adjust from there based on the situation.
Shutter Speed
Shutter speed controls how long the sensor is exposed to light. It determines whether motion is frozen or blurred.
- Fast shutter (1/500s, 1/1000s): Freezes action. Essential for wildlife, sports, moving water you want to look crisp. Use this when you or your subject is moving.
- Slow shutter (1/30s, 1/15s, 1 second+): Creates motion blur. Makes waterfalls look silky, star trails appear, and rivers smooth out. Requires a tripod or stable surface.
Adventure travel default: 1/250s. Fast enough to get sharp handheld shots while hiking or moving. Increase for wildlife and action; decrease for creative motion effects.
ISO
ISO controls the sensor’s sensitivity to light. Higher ISO means brighter images in low light but introduces grain (noise).
- ISO 100-400: Clean, crisp images. Use in daylight and bright conditions.
- ISO 800-1600: Moderate noise. Acceptable for dawn, dusk, and overcast conditions.
- ISO 3200-6400: Noticeable noise. Use only when necessary — deep shade, indoor/cave photography, astrophotography.
Adventure travel default: ISO 200 in daylight. Auto ISO with a maximum of 3200 works well for changing conditions.
Camera Modes for Adventure Photography
Aperture Priority (A or Av mode)
This is the mode most adventure travel photographers live in. You set the aperture and ISO; the camera selects the shutter speed. This gives you control over depth of field (the most creative decision in landscape photography) while letting the camera handle exposure calculations as light changes.
When to use: 80 percent of adventure travel situations — landscapes, portraits, general travel photography.
Shutter Priority (S or Tv mode)
You set the shutter speed; the camera selects the aperture. Use this when controlling motion is the priority.
When to use: Wildlife photography, action sports, waterfalls, anything where motion rendering matters more than depth of field.
Manual Mode
You control everything. Essential for astrophotography, studio-like setups, and situations where the camera’s metering is fooled (snow, backlighting, caves).
When to use: Night sky photography, consistent studio-style shots, and when you want complete creative control. For most travel photography, aperture priority is faster and just as effective.
Composition: The Rules That Actually Matter
Composition is how you arrange elements within the frame. Good composition turns a snapshot into a photograph. These rules are not arbitrary — they are based on how human eyes scan images.
Rule of Thirds
Divide your frame into a 3x3 grid (most cameras display this overlay), as taught by Digital Photography School. Place your main subject on one of the four intersection points rather than dead center. Place the horizon on the top or bottom third line, not in the middle.
This works because centered compositions feel static. Off-center placement creates visual tension and directs the viewer’s eye through the image.
Leading Lines
Use natural lines — trails, rivers, ridgelines, fences, roads — to draw the viewer’s eye into the frame and toward your subject. A hiking trail leading from the bottom corner to a distant mountain peak creates depth and narrative. A river winding through a valley pulls the eye from foreground to background.
Leading lines are everywhere in adventure landscapes. Train yourself to see them.
Foreground Interest
The most common mistake in landscape photography is photographing a beautiful distant scene with nothing in the foreground. The result is a flat image that fails to convey the depth and scale you experienced.
Fix this by including foreground elements: a rock, a wildflower, a tent, a pair of boots, a river bank. Get low — knee height or ground level — to make the foreground prominent. The foreground anchors the image and gives the viewer a visual entry point.
Scale Reference
Mountains, canyons, and forests are hard to photograph because cameras flatten depth and scale. A towering cliff looks like a modest rock face. A vast desert looks like a small beach.
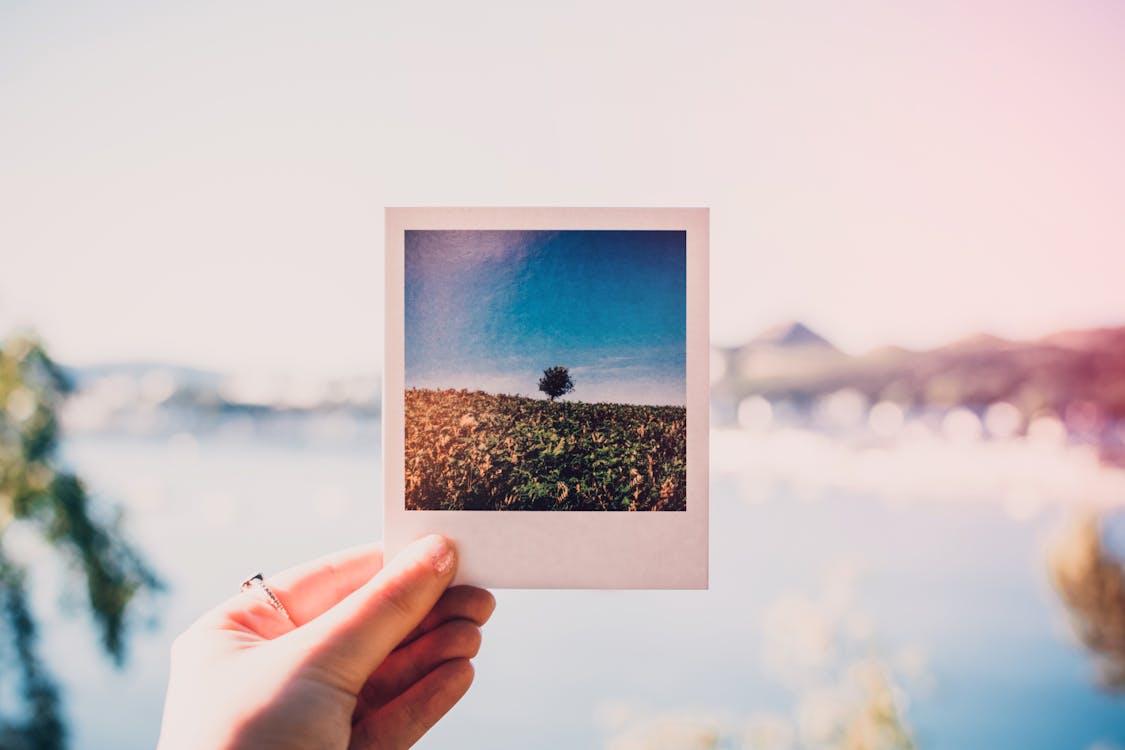
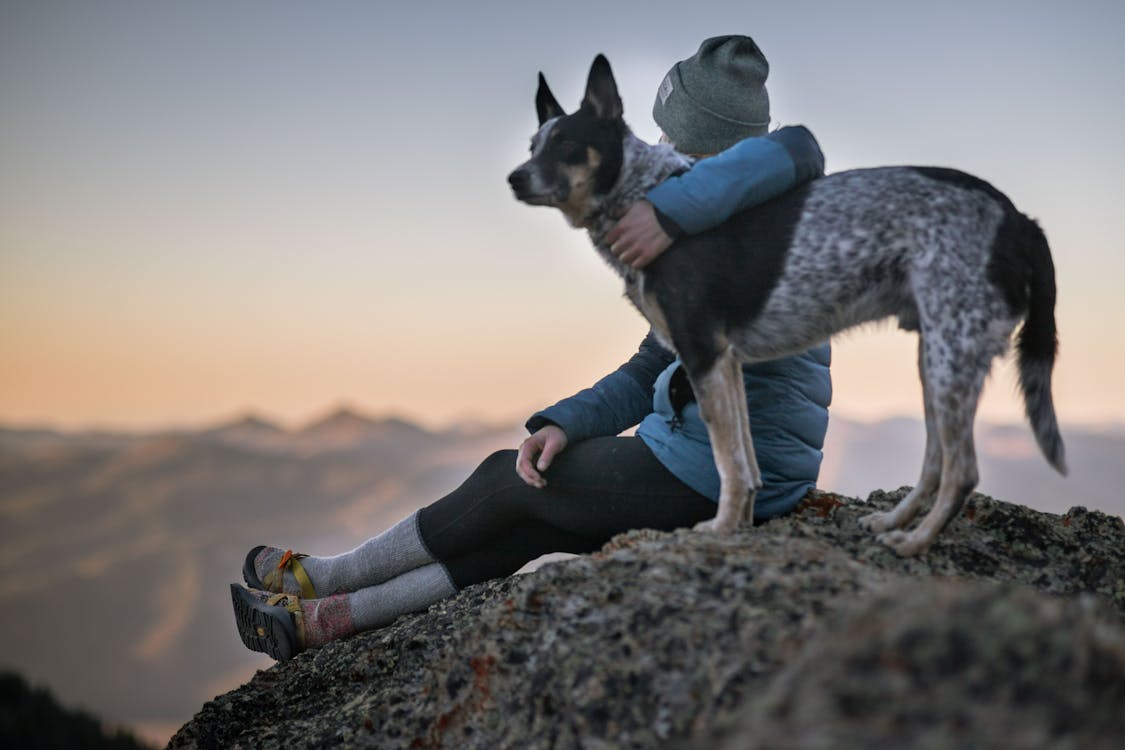
Include a human figure, a tent, or a recognizable object to provide scale. A tiny silhouette on a ridgeline communicates the mountain’s size in a way that the mountain alone cannot. This is why the best adventure travel photos almost always include a person.
Simplify
The human eye can scan a panoramic vista and focus on what matters. A camera captures everything indiscriminately. When your frame is cluttered — too many trees, too many rocks, too much sky — the viewer’s eye has nowhere to rest.
Simplify. Ask: what is the subject of this photo? Then compose to emphasize that subject and minimize distractions. Sometimes this means zooming in rather than zooming out.
Light: The Single Biggest Factor
Light quality affects your photos more than any camera, lens, or editing technique. Understanding when and how to use light is the difference between amateur and professional-quality images.
Golden Hour
The hour after sunrise and the hour before sunset produce warm, directional light that reveals texture, creates long shadows, and bathes landscapes in gold. By far the best time to shoot adventure travel photography.
Practical advice: Set your alarm. The best light happens early, and most travelers are still asleep. Wake up, get into position, and shoot during the first hour of daylight. Then eat breakfast. Our guide to GPS watches covers devices that can alert you to sunrise times.
Blue Hour
The 20-30 minutes before sunrise and after sunset produce cool, blue-toned light with no harsh shadows. Excellent for moody landscapes, camp scenes, and silhouettes. Low light requires slower shutter speeds or higher ISO.
Overcast Days
Cloud cover acts as a natural diffuser, eliminating harsh shadows and creating even, soft light. Overcast days are ideal for forest photography, waterfall shots, and portraits. Colors appear more saturated under cloud cover because there is no competing glare.
Do not put your camera away on cloudy days. Some of the best adventure travel photos happen under clouds.
Harsh Midday Sun
The worst light for photography: overhead, bright, creating dark shadows and washed-out highlights. If you must shoot at midday, look for shade, shoot into canyons where the light is filtered, or focus on details and close-ups rather than sweeping landscapes.
Backlight
Shooting toward the sun creates silhouettes and rim-lit edges on subjects. This is intentional backlight, and it can produce dramatic images — a hiker silhouetted against a sunrise, spray from a waterfall catching the light, dust particles illuminated in a shaft of sunlight.
Control backlight by exposing for the bright background (creating a silhouette) or exposing for the subject (requiring fill flash or reflector to avoid a blown-out sky).
Adventure-Specific Photography Techniques
Hiking and Trekking
Stop walking to take photos. Photos taken while moving are always worse than photos taken while stationary. When you see a composition, stop, stabilize, compose deliberately, and shoot.
Use a wide-angle lens (16-35mm equivalent) for landscape shots and a moderate telephoto (70-200mm) for compressing distant mountain layers. Bring a lightweight tripod or gorilla pod for dawn and dusk shots.
Tip: Photograph the hike, not just the destination. The trail through the forest, the boot on the rock, the steam rising from a cup of coffee at camp — these images tell the story of the experience better than a generic summit panorama.
Water Sports
Water and cameras are natural enemies. Protect your gear with a waterproof camera (see our waterproof camera guide) or a waterproof housing for your primary camera.
For kayaking, rafting, and wing foiling, mount an action camera (GoPro Hero 13 or DJI Osmo Action 5) on your helmet, paddle, or boat for hands-free footage. Use burst mode to capture peak moments in splashes and rapids.
Shutter speed: 1/1000s minimum to freeze water droplets. Higher if possible.
Wildlife
Wildlife photography requires patience, a long lens, and the ability to remain still and quiet. A 200-600mm zoom lens is ideal for most wildlife situations, but even a 70-300mm gets you closer than a standard travel zoom.
Use shutter priority mode at 1/500s or faster to freeze animal movement. Continuous autofocus (AF-C or AI Servo) tracks moving animals better than single-shot autofocus. Shoot in bursts — animals’ peak expressions and movements last fractions of a second.
Ethical note: Never bait, chase, or disturb wildlife for a photograph. If your presence changes the animal’s behavior, you are too close.
Night Sky and Astrophotography
Adventure travel often takes you to places with minimal light pollution — perfect for astrophotography. Basic Milky Way photography requires:
- Manual mode
- Wide-angle lens (14-24mm equivalent), widest aperture (f/2.8 ideal, f/4 workable)
- Shutter speed: 15-25 seconds (longer creates star trails due to Earth’s rotation)
- ISO: 3200-6400
- Tripod: Essential. No handheld astrophotography works.
- Timer or remote shutter to avoid camera shake
Focus on a bright star using live view magnification, then switch to manual focus. Compose with foreground interest — a tent, a tree, a mountain silhouette — to give the Milky Way context.
Cave Photography
Caves present extreme photography challenges: no natural light, high humidity, confined spaces, and the risk of damaging delicate formations. Use a headlamp for navigation and a separate light source for photography.
A single directional light (flashlight or off-camera flash) aimed at cave formations from an angle creates drama and depth. Front-lit cave photos (flash on camera) look flat and unimpressive. Off-axis lighting reveals texture and three-dimensionality.
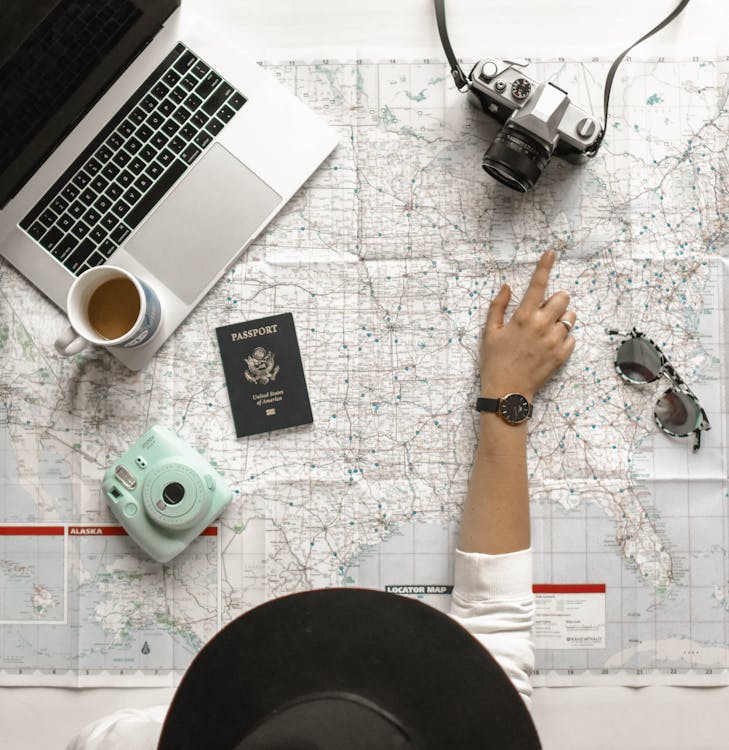
Gear Recommendations for Adventure Travel Photography
Camera Body
In 2026, mirrorless cameras dominate adventure travel photography. They are lighter, more compact, and more capable than DSLRs. Top recommendations by budget:
- Budget ($500-800): Sony a6400, Fujifilm X-T30 II. Excellent image quality, compact, weather-sealed.
- Mid-range ($1,200-2,000): Sony a7C II, Fujifilm X-T5. Full-frame or APS-C sensor, outstanding autofocus, rugged.
- Premium ($2,500+): Sony a7R V, Nikon Z8. Maximum resolution, professional-grade weather sealing, dual card slots.
The honest truth: A $500 camera with good technique produces better photos than a $3,000 camera with poor technique. Invest in learning before investing in gear.
Smartphone Photography
Modern smartphones (iPhone 16 Pro, Samsung Galaxy S26, Google Pixel 10) produce stunning photos in good light. For many adventure travelers, a smartphone is the only camera they need. Advantages include always-available, lightweight, instant sharing, and computational photography that handles challenging light better than many dedicated cameras.
When a dedicated camera still wins: Low light, wildlife (telephoto reach), creative control (shallow depth of field), and print-quality enlargements.
Essential Accessories
- Spare batteries: Cold weather drains batteries. Carry at least two spares. Keep them warm in a pocket close to your body.
- Memory cards: Two 128GB cards are better than one 256GB card. If a card fails, you lose half your photos, not all of them.
- Lens cloth: Dust, rain, and fingerprints are constant. A microfiber cloth in your pocket prevents ruined shots.
- Dry bags: Protect camera gear from rain, river crossings, and boat spray. See our dry bag guide.
- Action and waterproof cameras: For water-based shoots and high-impact activities, our best waterproof cameras for adventure travel roundup covers the top rugged cameras we tested across surf, whitewater, and rain forest conditions.
- Tripod: A carbon fiber travel tripod (Peak Design Travel Tripod or Gitzo Traveler) enables long exposures, self-portraits, and sharp low-light shots.
Editing: The Other Half of Photography
Shooting is half the process. Editing is the other half. Even professional photographers edit every image they publish. This is not “cheating” — it is completing the creative process.
Recommended Editing Software
- Adobe Lightroom: The industry standard. Available as a mobile app (free with limitations) or desktop subscription ($10/month). Excellent for batch editing and organization.
- Snapseed (free): Google’s mobile editor. Surprisingly powerful for a free app. Ideal for quick edits on the road.
- Capture One: Professional alternative to Lightroom with superior color handling. Higher learning curve.
Basic Editing Workflow
- Crop and straighten: Fix horizons that are not level. Tighten composition by cropping out distractions.
- Exposure adjustment: Brighten underexposed images, recover highlights in overexposed ones.
- White balance: Warm up images shot in shade (they tend blue) or cool down images shot in tungsten light (they tend yellow).
- Contrast: Increase slightly to add punch. Decrease in harsh light situations to recover shadow detail.
- Saturation/vibrance: Increase vibrance (not saturation) by 10-20 points for richer colors without unnatural look.
- Sharpening: Apply moderate sharpening for screen display. Increase for prints.
The golden rule of editing: If it looks edited, you have gone too far. Subtle adjustments that enhance the image without making it look artificial are always better than heavy-handed filters.
Common Mistakes and How to Avoid Them
Shooting only horizontal. Rotate your camera. Vertical compositions work better for tall subjects (waterfalls, trees, narrow canyons) and for social media sharing.
Chimping (constantly checking the screen). Glancing at every photo you take takes you out of the moment and causes you to miss the next shot. Review images at camp, not on the trail.
Never photographing people. Pure landscape photos get repetitive. Include your travel companions, local people (with permission), and yourself in the scene. People add story, scale, and emotion.
Carrying too much gear. The best camera is the one you have with you. If your camera bag is so heavy that you leave it at camp, you will miss every photo. Travel light. One body, one or two lenses, spare batteries, cards. That is enough.
Not backing up. Memory cards fail. Phones get stolen. Back up your photos daily — to a portable hard drive, cloud storage, or a second card. Losing a trip’s worth of photos is devastating and preventable.
For protecting your expensive camera gear on the road, review our adventure travel safety guide for security strategies and our adventure travel insurance guide for gear coverage options.
The Most Important Photography Tip
Put the camera down sometimes. The most common regret of adventure travelers is not that they failed to capture a moment, but that they experienced their entire trip through a viewfinder. The sunset you watch with your own eyes, the trail you hike without stopping every fifty meters for a photo, the meal you eat without documenting it — these experiences are not diminished by the absence of a photograph. They are enhanced by your full presence.
Photograph deliberately. Photograph the moments that genuinely move you. And then put the camera away and live the adventure. The best photograph from any trip is the one that triggers the memory. And the best memory is the one you were fully present for.
Get the best ThrillStays tips in your inbox
Weekly guides, deals, and insider tips. No spam, unsubscribe anytime.